Lacing up your Veja sneakers properly can be tricky, but it doesn’t have to be! When I first tried lacing up my new Veja sneakers, I struggled. No matter which holes I used, the laces wouldn’t stay tied and kept coming undone. Frustrated, I almost gave up and buried them in my closet. But then I found a simple online tutorial for properly lacing Veja sneakers, which worked like magic!
Since learning this simple technique, these sneakers have become one of my go-to pairs. I’ll discuss easy but effective methods I’ve learned for lacing Veja sneakers just right so you can focus on more important things. By the end, you’ll be lacing confidently and never dealing with loose sneakers or sore spots again. Let’s get started!
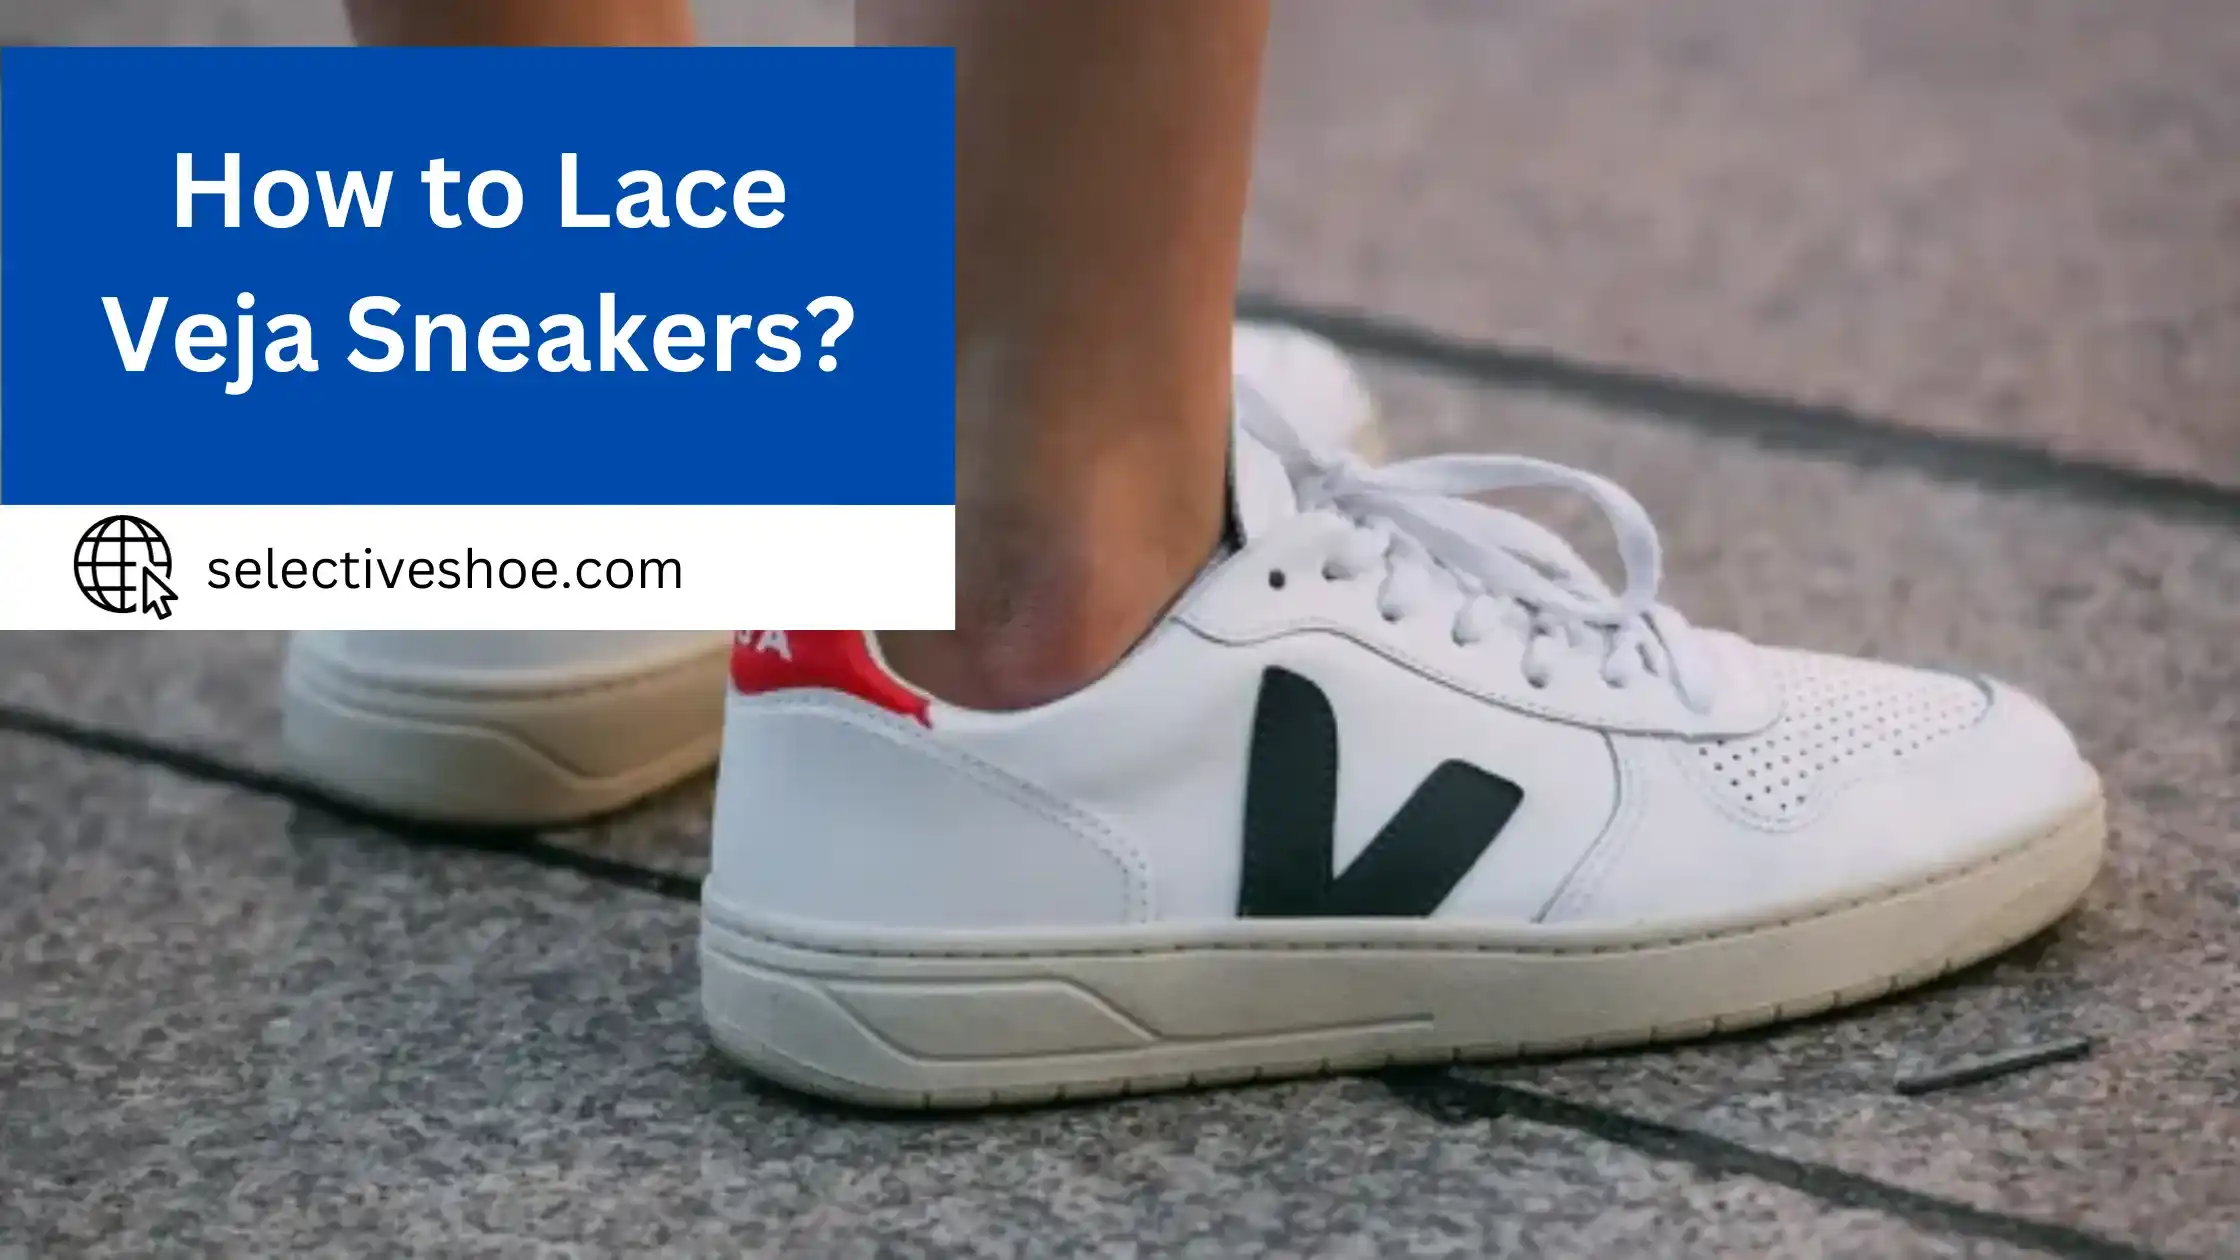
Step-by-Step Guide: How to Lace Your Veja Sneakers?
Here’s a step-by-step guide based on my experience to ensure your Veja sneakers are snug and showcase their unique style.
Step 1- Unlace My Veja Sneakers:
First, let’s start by removing the laces from my Veja sneakers. It’s like giving them a fresh canvas for a new, personalized look.
Step 2- Choose My Lacing Style:
Considering my experiences, I decided to go for the classic crisscross pattern. It gives a clean and timeless vibe that I love. But you can choose any style that resonates with you.
Step 3- Begin Lacing:
As I started threading the laces :through the bottom eyelets, I remember a time when I tried a funky pattern, and it ended up feeling too tight. Lesson learned: balance is essential. So, I keep the tension even as I progress upward with the crisscross.
Step 4- Adjust Tightness:
Incorporating some of the past, I recall a day when overly tight laces made my feet ache. Not this time! I check the tightness regularly to strike that sweet spot between snug and comfortable.
Step 5- Secure the Ends:
After completing the crisscross pattern, I tie a knot at the top. I smile, remembering a fashion mishap when a poorly tied bow unraveled during a stroll. Today, I make sure my bow is tight and secure.
Step 6- Check Symmetry:
I take a moment to ensure both sides mirror each other perfectly. A touch of symmetry goes a long way.
Step 7- Trim Excess Lace:
I trim the excess carefully. It’s a balancing act of enough length for future adjustments without creating hazards.
Step 8- Finishing Touches:
I give my Veja sneakers a final inspection. All knots secured, the crisscross pattern looking sharp. I’m ready to hit the streets. These laces tell a story of past lessons and a present, perfectly laced pair of sneakers!
Creative Lacing Techniques for Veja Sneakers:
Here are a few creative lacing techniques that I’ve tried and loved:
The Straight Lace:
This was the first technique I experimented with. It’s clean, minimalistic, and easy to do. I start by inserting both ends of the lace into the two holes at the bottom from the outside. Then, I take one end of the lace and skip a hole before inserting it from the inside.
Repeat this process with the other end of the lace on the opposite side. I keep alternating sides and skipping holes until I reach the top. The final look is a series of parallel lines, sleek and straightforward.
The Checkerboard Lace:
This one’s more complex, but the effect is worth it. It’s best suited for sneakers with lace holes like my V-10s. I start with the straight lace, but instead of skipping a hole, I insert the lace back into the same hole from the outside.
Then, I remove it from the next hole on the same side. Repeat this process, alternating sides until I reach the top. The result is a checkerboard-like pattern that’s sure to turn heads.
The Ladder Lace:
The ladder lace technique is my go-to for a unique, eye-catching look. I begin as usual by inserting both ends of the lace into the bottom two holes from the outside. Then, I insert one end of the lace into the second hole on the same side from the inside.
I cross it over to the opposite side and insert it into the same hole from the outside. Then, repeat this process, alternating sides until I reach the top. It might take a few tries (it certainly did for me), but the final ladder-like look is worth the effort.
The Loop-Back Lace:
This technique is a fun twist on traditional lacing. I start by inserting one end of the lace into the bottom hole from the outside and the other end into the second hole on the same side from the inside.
Then, cross the second end to the opposite side and insert it into the same hole from the outside. Loop it back and insert it into the next hole on the same side from the inside. Then, I repeat this process until I reach the top. It took me a while to get this one right, but it quickly became one of my favorites once I did.
Remember, these techniques are just a starting point. Feel free to experiment and create your unique lacing styles; that’s the beauty of Veja sneakers!
Maintenance Tips- Keeping Your Veja Sneakers and Laces in Top Condition:
I’ve learned the importance of proper maintenance to keep them looking fresh and new. Here are some tried-and-tested tips on how to keep your Veja sneakers and laces in top condition.
Regular Cleaning:
It might seem obvious, but regular cleaning is crucial. I use a soft brush or cloth to remove dirt and dust from my sneakers after each wear. Use a gentle, eco-friendly cleaner and a little water for stubborn stains.
Washing Laces:
Your laces can quickly become dirty and discolored over time. I remove them from my sneakers and hand wash them using a mild detergent. Then, I allow them to air dry entirely before re-lacing my shoes.
Avoiding Harsh Chemicals:
Veja sneakers are known for their organic materials, so it’s best to avoid harsh cleaning chemicals that could damage them. I stick to natural, gentle cleaners whenever possible.
Drying Properly:
I never put my Veja sneakers in the dryer or near a heat source to dry. This can warp their shape and damage the materials. Instead, let them air dry naturally.
Rotate Your Sneakers:
I avoid wearing the same pair of sneakers daily to prevent wear and tear. Rotating your shoes allows them to breathe and recover from the stress of wear.
Store Correctly:
When not in use, I store your Veja sneakers in a cool, dry place out of direct sunlight. And remember to keep them in a shoe bag or box to protect them from dust and moisture.
Use a Shoe Protector Spray:
A good quality shoe protector spray can help to repel water and prevent stains. Just ensure the one you choose suits the materials your Veja sneakers are made from.
Conclusion:
Learning how to lace Veja sneakers can improve the look and feel of these shoes. Experimentation was key here as I tried different lacing techniques until I found one that worked best for me. Knowing how to lace these shoes properly gave them a better appearance and improved their comfort since my feet were more secure. After all my experimentation, I am proud to have mastered the art of lacing Veja sneakers and offer this knowledge as advice should you purchase a pair for yourself. With enough trial and error, you’ll soon be able to find the proper method of lacing that works for you!