Painting cowboy boots yourself isn’t as intimidating of a task as it might initially seem, and can be done with just a few simple steps. With patience and dedication, I know from experience that you’ll achieve the perfect look for your rocking boots in no time at all!
After unsuccessfully attempting to paint my own Cowboy Boots two weeks ago, I have come to learn which tips really make a big difference when painting these fun adornments. I will share the guidelines on how to properly paint Cowboy Boots for anyone who wants their footwear to stand out in the room!
Gathering The Right Materials: Essential Supplies For Painting Cowboy Boots
Gathering the right materials for painting cowboy boots is a crucial step in ensuring that your project turns out just as you envision. From my personal experience, the key is to focus on quality and compatibility. Here’s a guide to help you choose the best supplies:
- Quality Leather Paint
- Sealers and Finishers
- Fine Paintbrushes
- Painter’s Tape
- Cleaning Supplies
Step-by-Step Guide On How To Paint Cowboy Boots?
Through my research, I discovered several tips and techniques that greatly contributed to the success of my cowboy boot painting project. Here are the steps I followed:
Step 1: Preparation
Preparing the boots is crucial for ensuring optimal paint adhesion and longevity. Based on my research and personal experience, here’s what I did:
Clean The Boots:
I thoroughly clean the surface of the boots using a good leather cleaner. This removes any dirt, oils, or residues that could hinder the paint’s adherence.
Sand The Surface:
Then I gently sand the boots using fine-grit sandpaper. This creates a slightly rough texture, allowing the paint to adhere better.
Step 2: Choosing The Right Paint
Selecting the appropriate paint is vital for achieving vibrant and long-lasting results. I discovered various options, such as:
Water-based Primer:
I apply a water-based primer to create a smooth base for the paint and enhance its durability.
Acrylic Paint:
I usually use high-quality acrylic paint specifically formulated for leather or fabric. These paints offer a wide range of colors and provide excellent coverage.
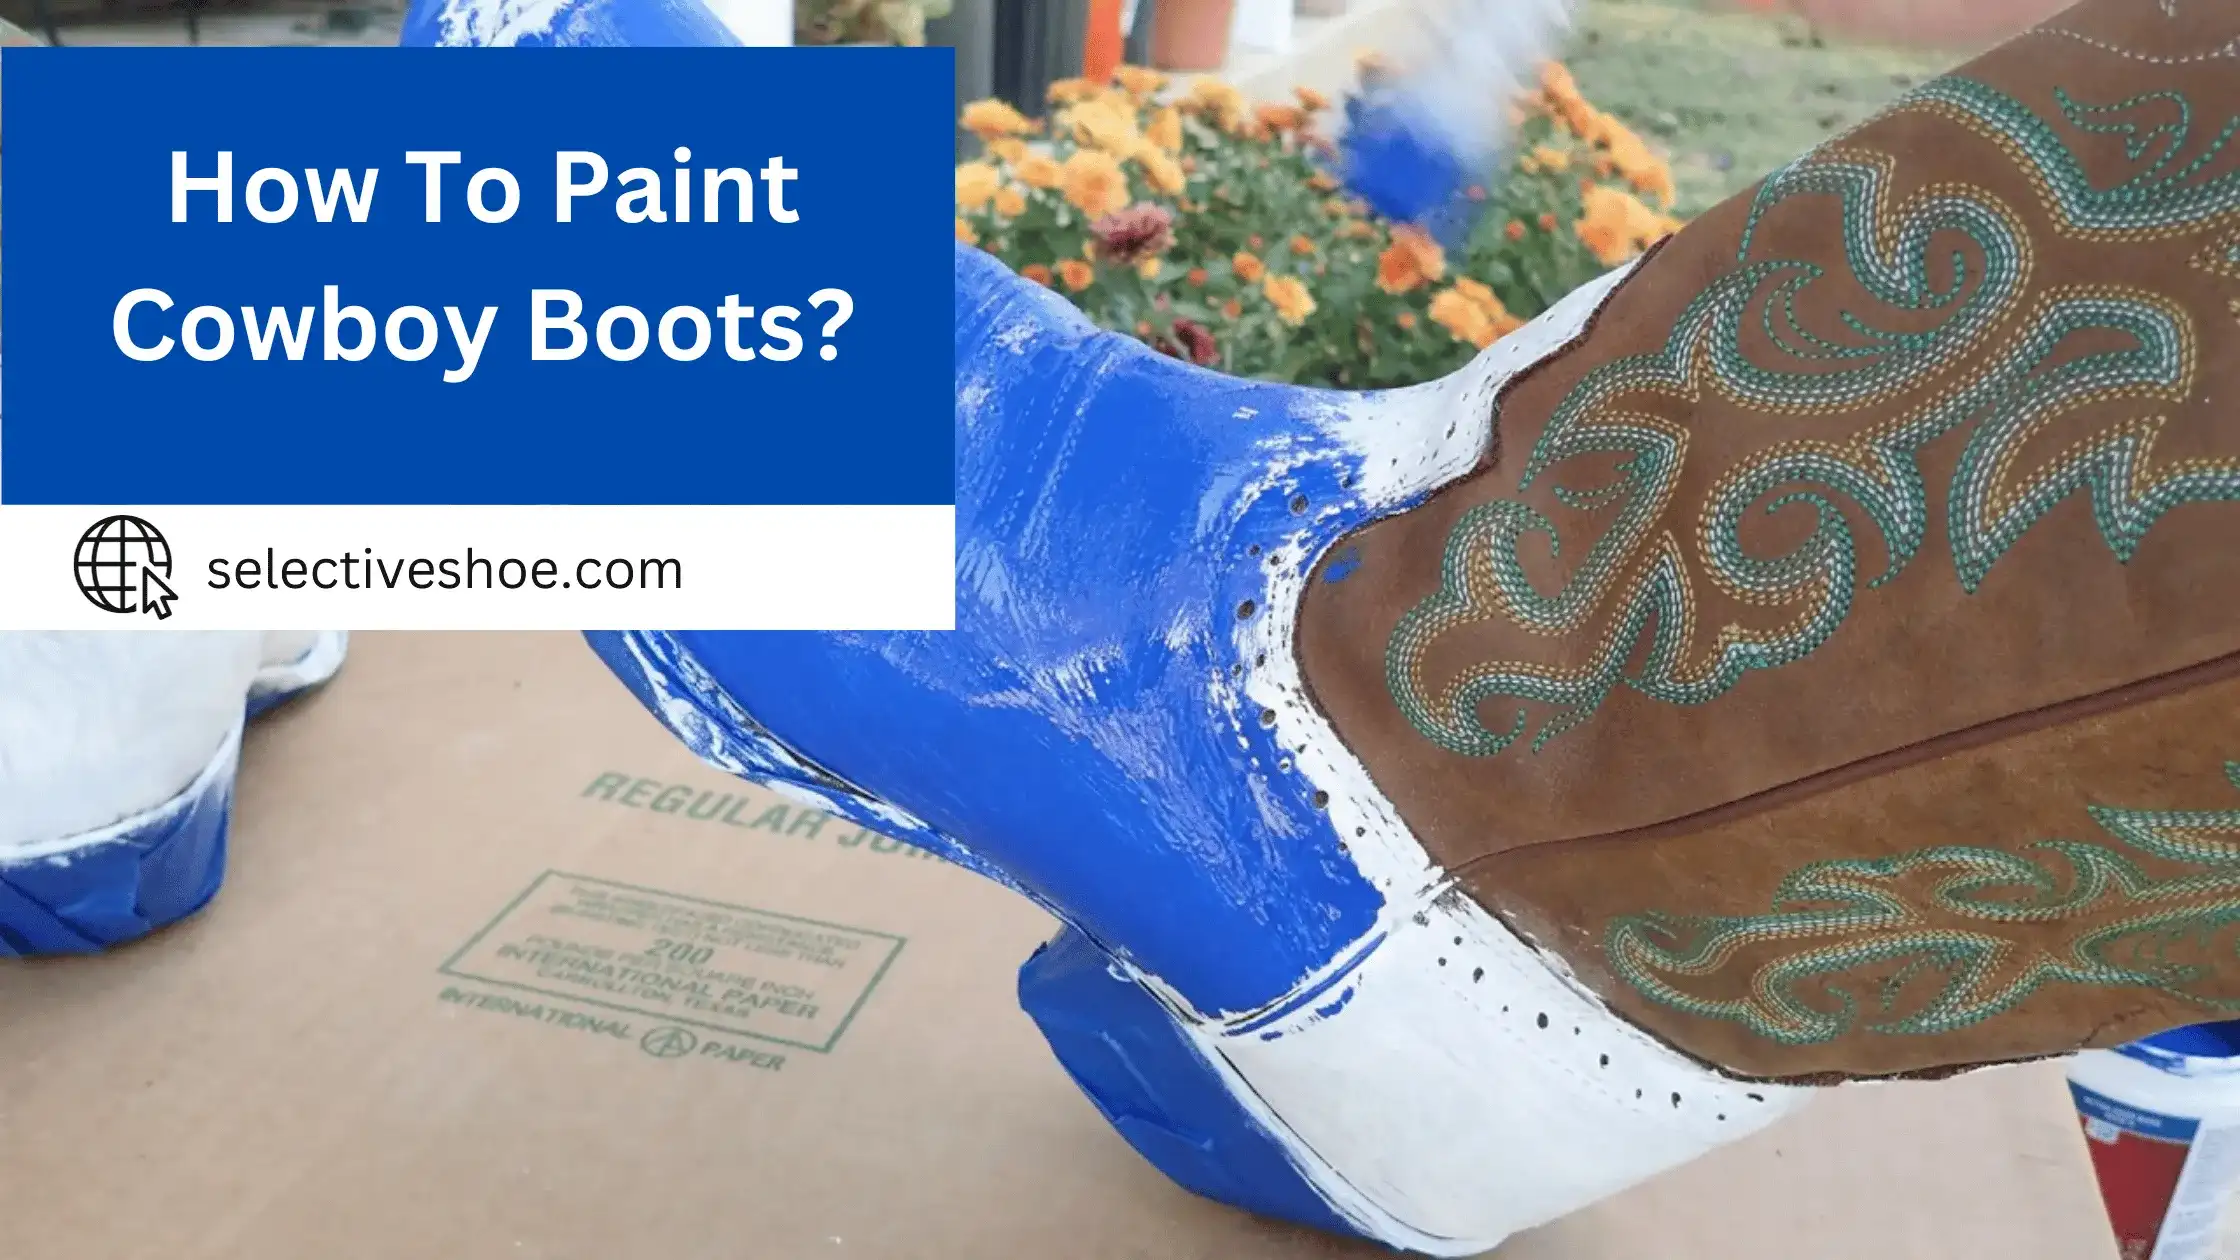
Step 3: Applying The Paint
When it comes to applying the paint, there are a few techniques that can help you achieve a professional finish:
Thin Coats:
apply thin coats of paint, allowing each layer to dry before applying the next. This prevents clumping and ensures an even application.
Brush Selection:
I choose brushes with fine bristles for precise detailing and broader brushes for larger areas. Experiment with different brush sizes to achieve the desired effects.
Blending And Shading:
I explore blending techniques to create gradient effects or shades. This adds depth and dimension to your painted design.
Step 4: Finishing Touches And Sealant
To protect my painted cowboy boots and enhance their longevity, I consider the following steps:
Allow Proper Drying Time:
I try to be patient and allow the paint to dry completely between coats and after the final application.
Apply A Sealant:
To protect the painted surface, I consider using a clear leather sealer or finisher. This provides a protective barrier against wear, tear, and fading.
By following these steps and techniques, I successfully transformed my plain cowboy boots into personalized and vibrant works of art.
Painting Techniques: Tips And Tricks For Achieving A Professional Finish
Through experimentation, research, and guidance from experienced artists, I discovered several tips and tricks that significantly improved my painting technique. These insights will help you achieve a professional finish and create captivating artwork.
Tip 1: Plan And Prepare
Before starting any painting, it’s essential to plan and prepare adequately. This includes:
- I select high-quality paints, brushes, and canvases suitable for my desired style and subject.
- I sketch out your composition lightly on the canvas using pencil or charcoal. This helps establish proportions, placement, and overall balance.
- I ensure that have ample lighting, a comfortable seating arrangement, and easy access to my materials to promote focus and productivity.
Tip 2: Practice Brush Control
Brush control is vital for achieving precise and controlled brushstrokes. Here’s what I’ve learned:
- I grip the brush near the base of the handle, allowing for better control and a lighter touch.
- I experiment with different pressures and angles to create varying effects. Light pressure creates delicate strokes, while heavier pressure adds depth and texture.
- I try to explore techniques like dry brushing, glazing, stippling, and blending to add dimension and visual interest to your paintings.
Tip 3: Layering And Blending Colors
Layering and blending colors can bring life and depth to your paintings. I consider the following techniques:
I apply multiple thin layers of paint instead of thick coats. This allows for smoother color transitions and avoids a muddy appearance.
I work with wet paint to blend colors seamlessly. I apply one color, then immediately blend in another using a clean brush or a blending tool.
Tip 4: Pay Attention To Detail
Incorporating details can take your painting from good to exceptional. Here are some tips
- I switch to smaller brushes to add intricate details and fine lines.
- I periodically step away from my painting to gain a fresh perspective and identify areas that need refinement.
Do’s And Don’ts While Painting Cowboy Boots:
By implementing these do’s and don’ts, I noticed a significant improvement in the quality and professionalism of my paintings.
Do’s:
- Clean the boots thoroughly using rubbing alcohol, and lightly sand them to create a slightly rough texture for better paint adherence.
- Apply multiple thin layers of paint instead of one thick layer. This ensures an even and smooth coverage, preventing globs or clumps.
- Patience is key! Allow each layer of paint to dry completely before applying the next one. Rushing the process can lead to smudging or smearing.
- Embrace your creativity by sketching out your design on paper before painting. This helps visualize the final result and allows you to plan the application of different colors and details.
- Don’t be afraid to explore different painting techniques, such as blending colors, adding texture, or using stencils. These techniques can enhance the overall look and make your design more unique.
Don’ts:
- Take your time to clean and prepare the boots properly. Neglecting this step can lead to paint not adhering well or peeling off.
- Applying thick layers of paint can result in a heavy and uneven finish. Thin layers allow for better control and a more professional-looking outcome.
- Once you’re satisfied with your painted design, apply a clear leather sealer or finisher to protect the paint and give it a polished look. Skipping this step can result in premature wear and fading.
- After painting your cowboy boots, store them carefully in a cool and dry place. Avoid stacking or squishing them, as this can cause the paint to crack or peel.
By following these do’s and don’ts, I was able to transform my cowboy boots into stunning pieces of art. The attention to detail, patience, and experimentation paid off, resulting in professional-looking finishes that garnered compliments and admiration.
Conclusion:
After all of this detailed discussion on how to stop your faux leather boots from squeaking, I hope you’re ready to try out these methods yourself. Take the time to give them a proper clean if nothing else works and store them in a dry environment with some newspaper stuffed inside before wearing them again. Despite my own past experience with having to deal with squeaky boots, don’t be disheartened as there are few ways you can stop this nuisance from happening. So grab your supplies and let’s start fighting that annoying squeak!